My name is Abishai Corey, and I am 18 years old. I ski at Waterville Valley Academy as a post-grad FIS athlete. I chose to take this year off from school to focus on skiing, which will help prepare me for my future in alpine racing. Today, I’ll share an important tip on how to keep your skis sharp while on the road. Access to a ski shop isn’t always easy when traveling, so having a tuning plan and sticking to it is crucial.
Learning to Tune
My dad taught me how to tune my skis at an early age. I remember being nervous about using the different colored diamond stones in the wrong order. That’s why I’m excited to join TOKO’s team and help others learn how to tune their skis.
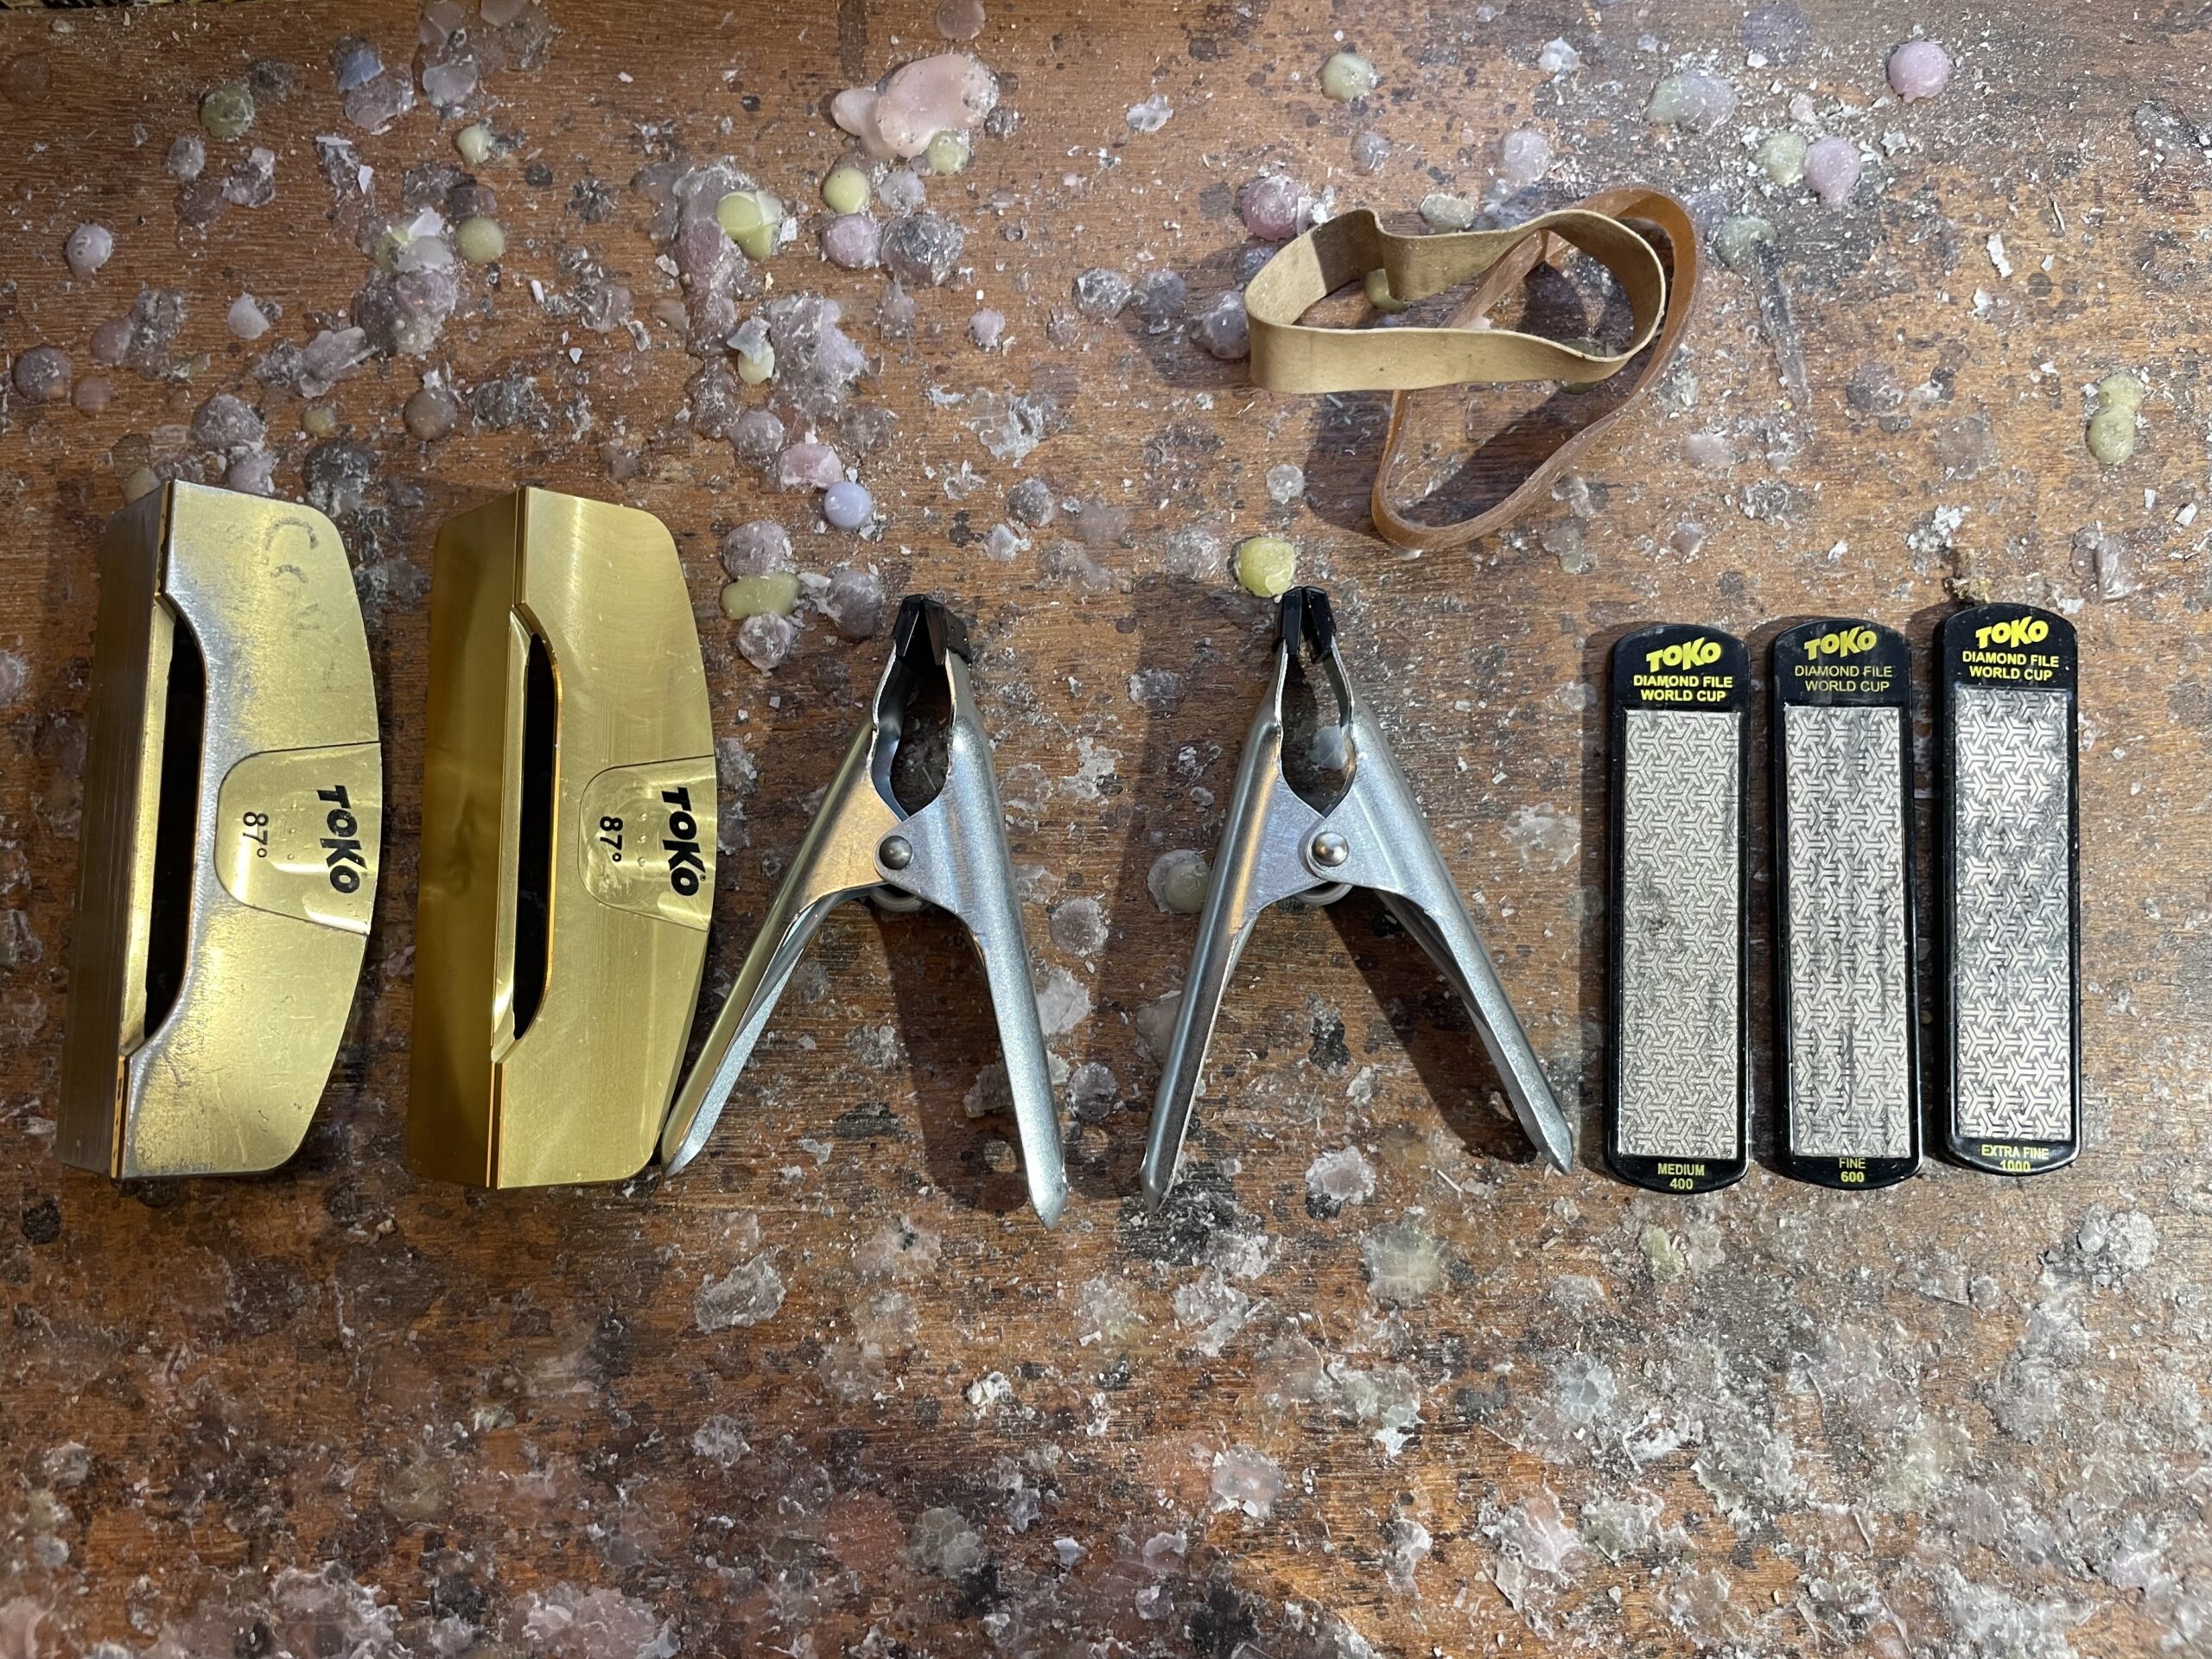
Let’s get started! Below is a photo of all the tools you’ll need for this session:
Post-Training Care
When I return from training, I immediately unstrap my skis and wipe them down with a towel. This keeps the skis dry and helps prevent rust. When it’s time to tune, I take a ski to my tuning bench, rubber-band the brakes, and clamp it to the bench using ski vises.
I start by wiping the edge again with a clean towel to remove any residual water or dirt. A clean edge ensures you don’t rub grime into the metal when passing the stone.
Using the Medium Stone
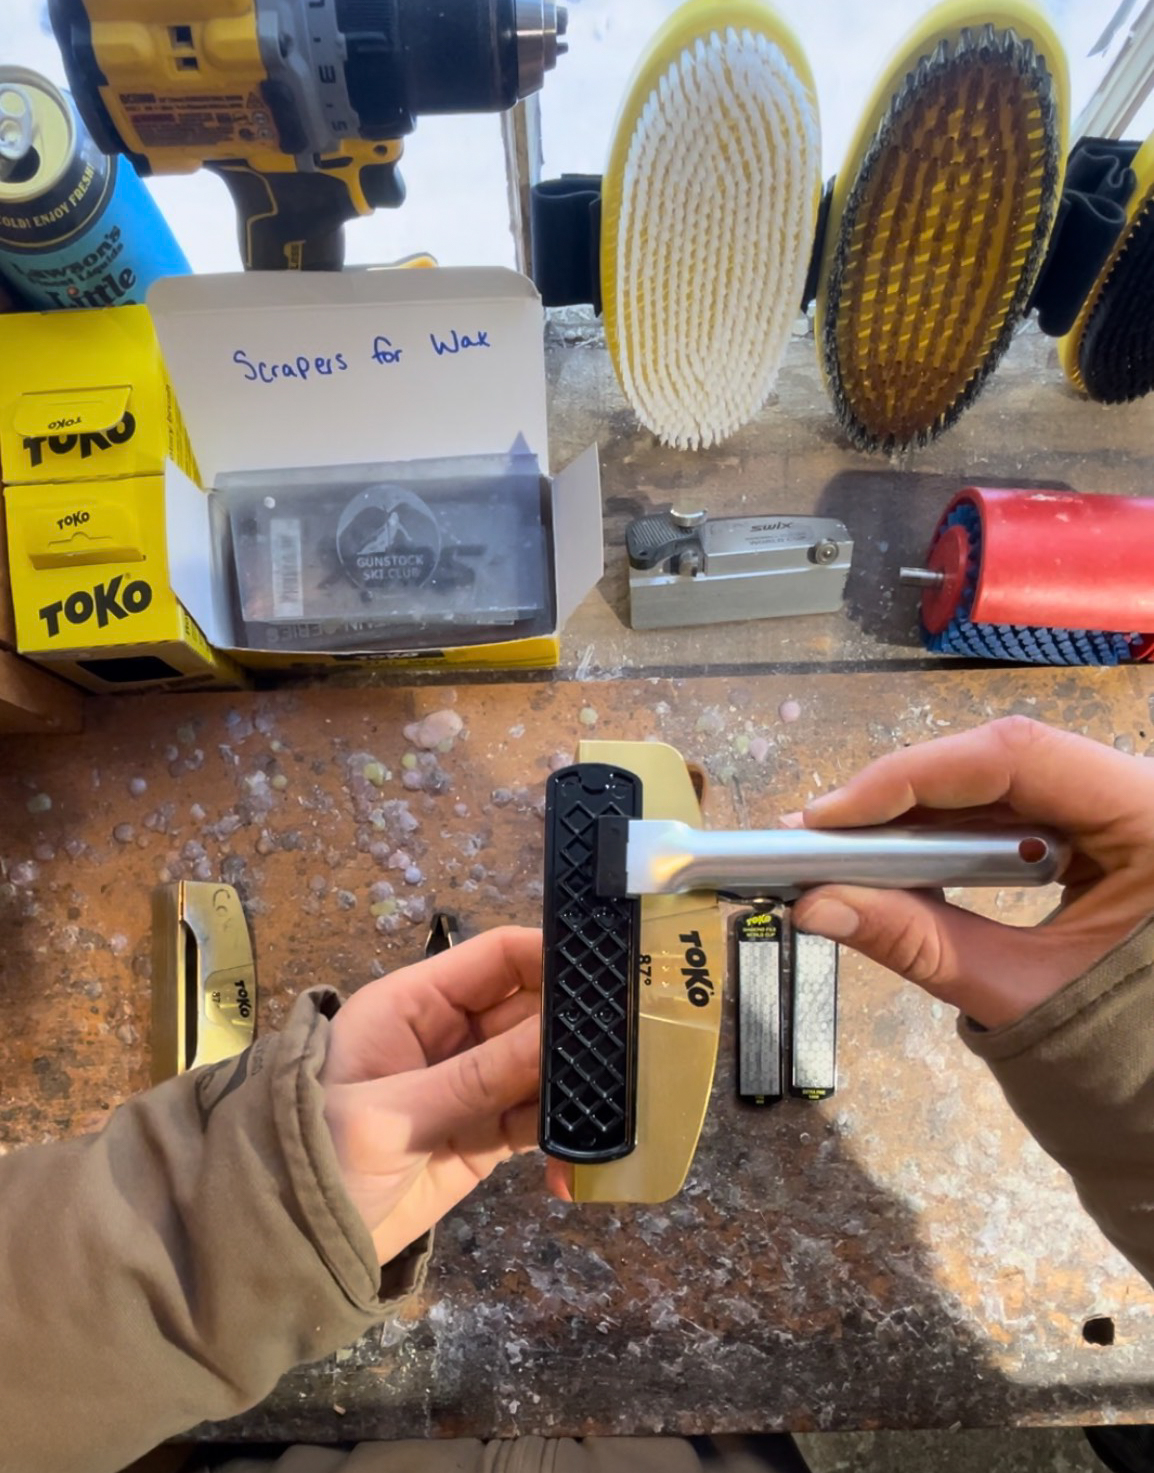
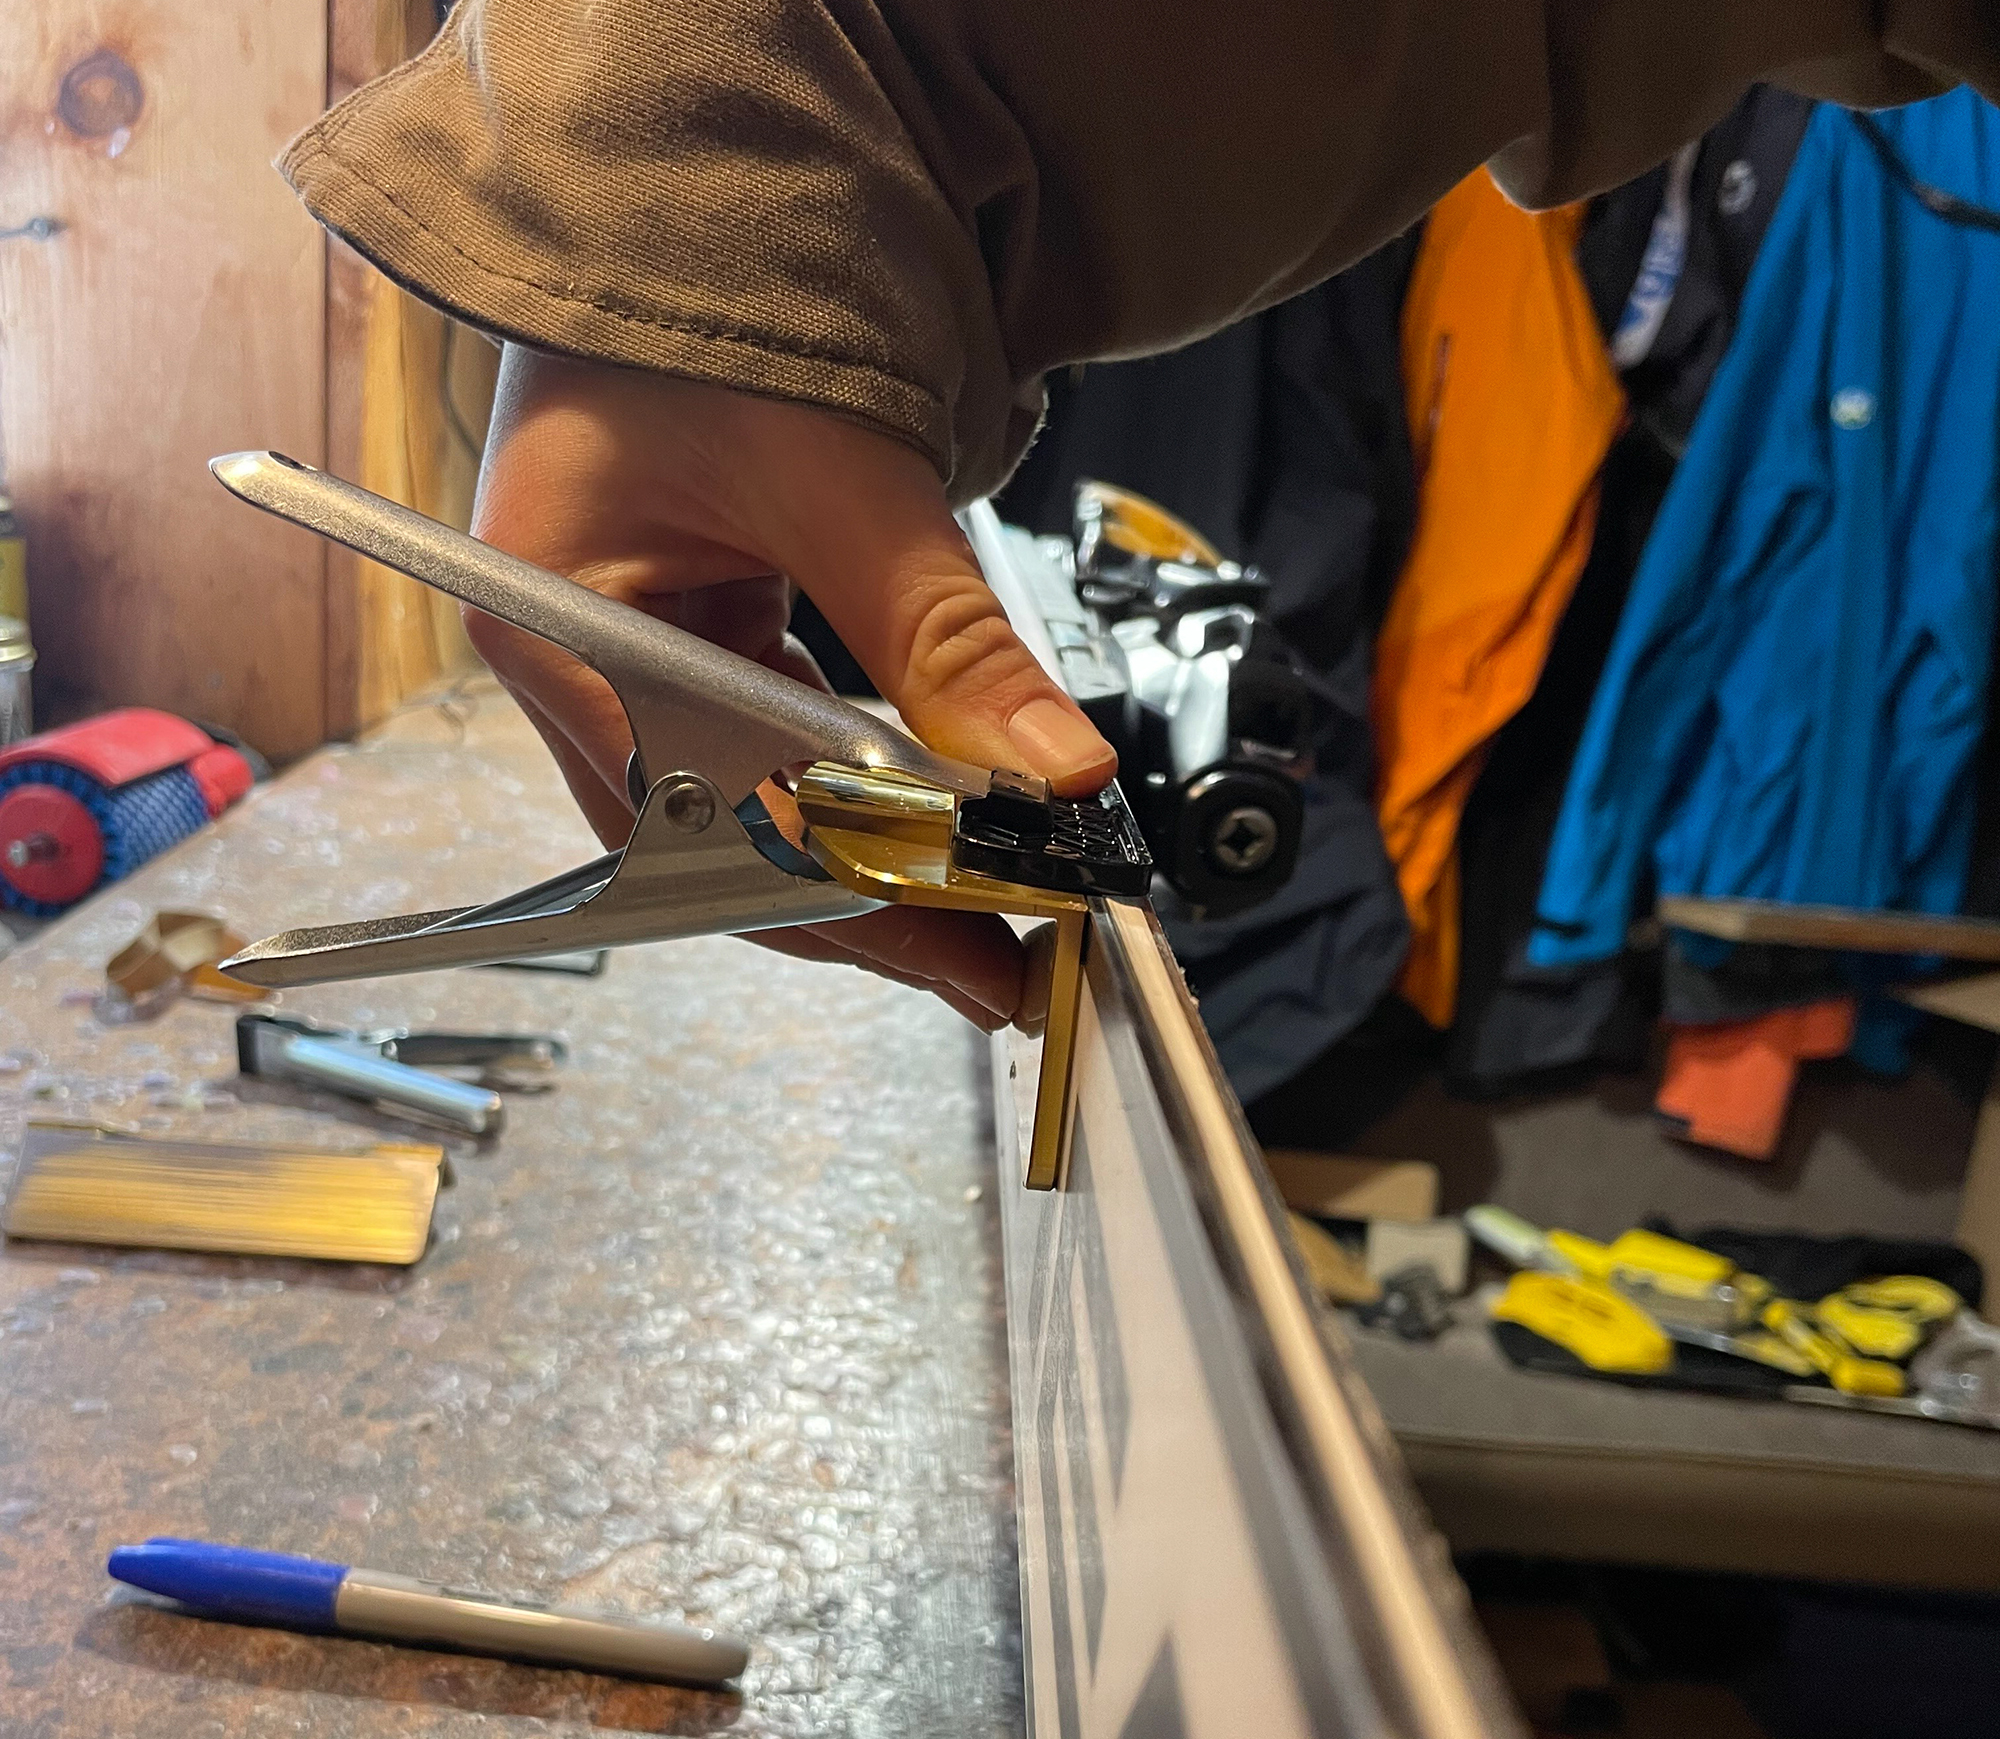
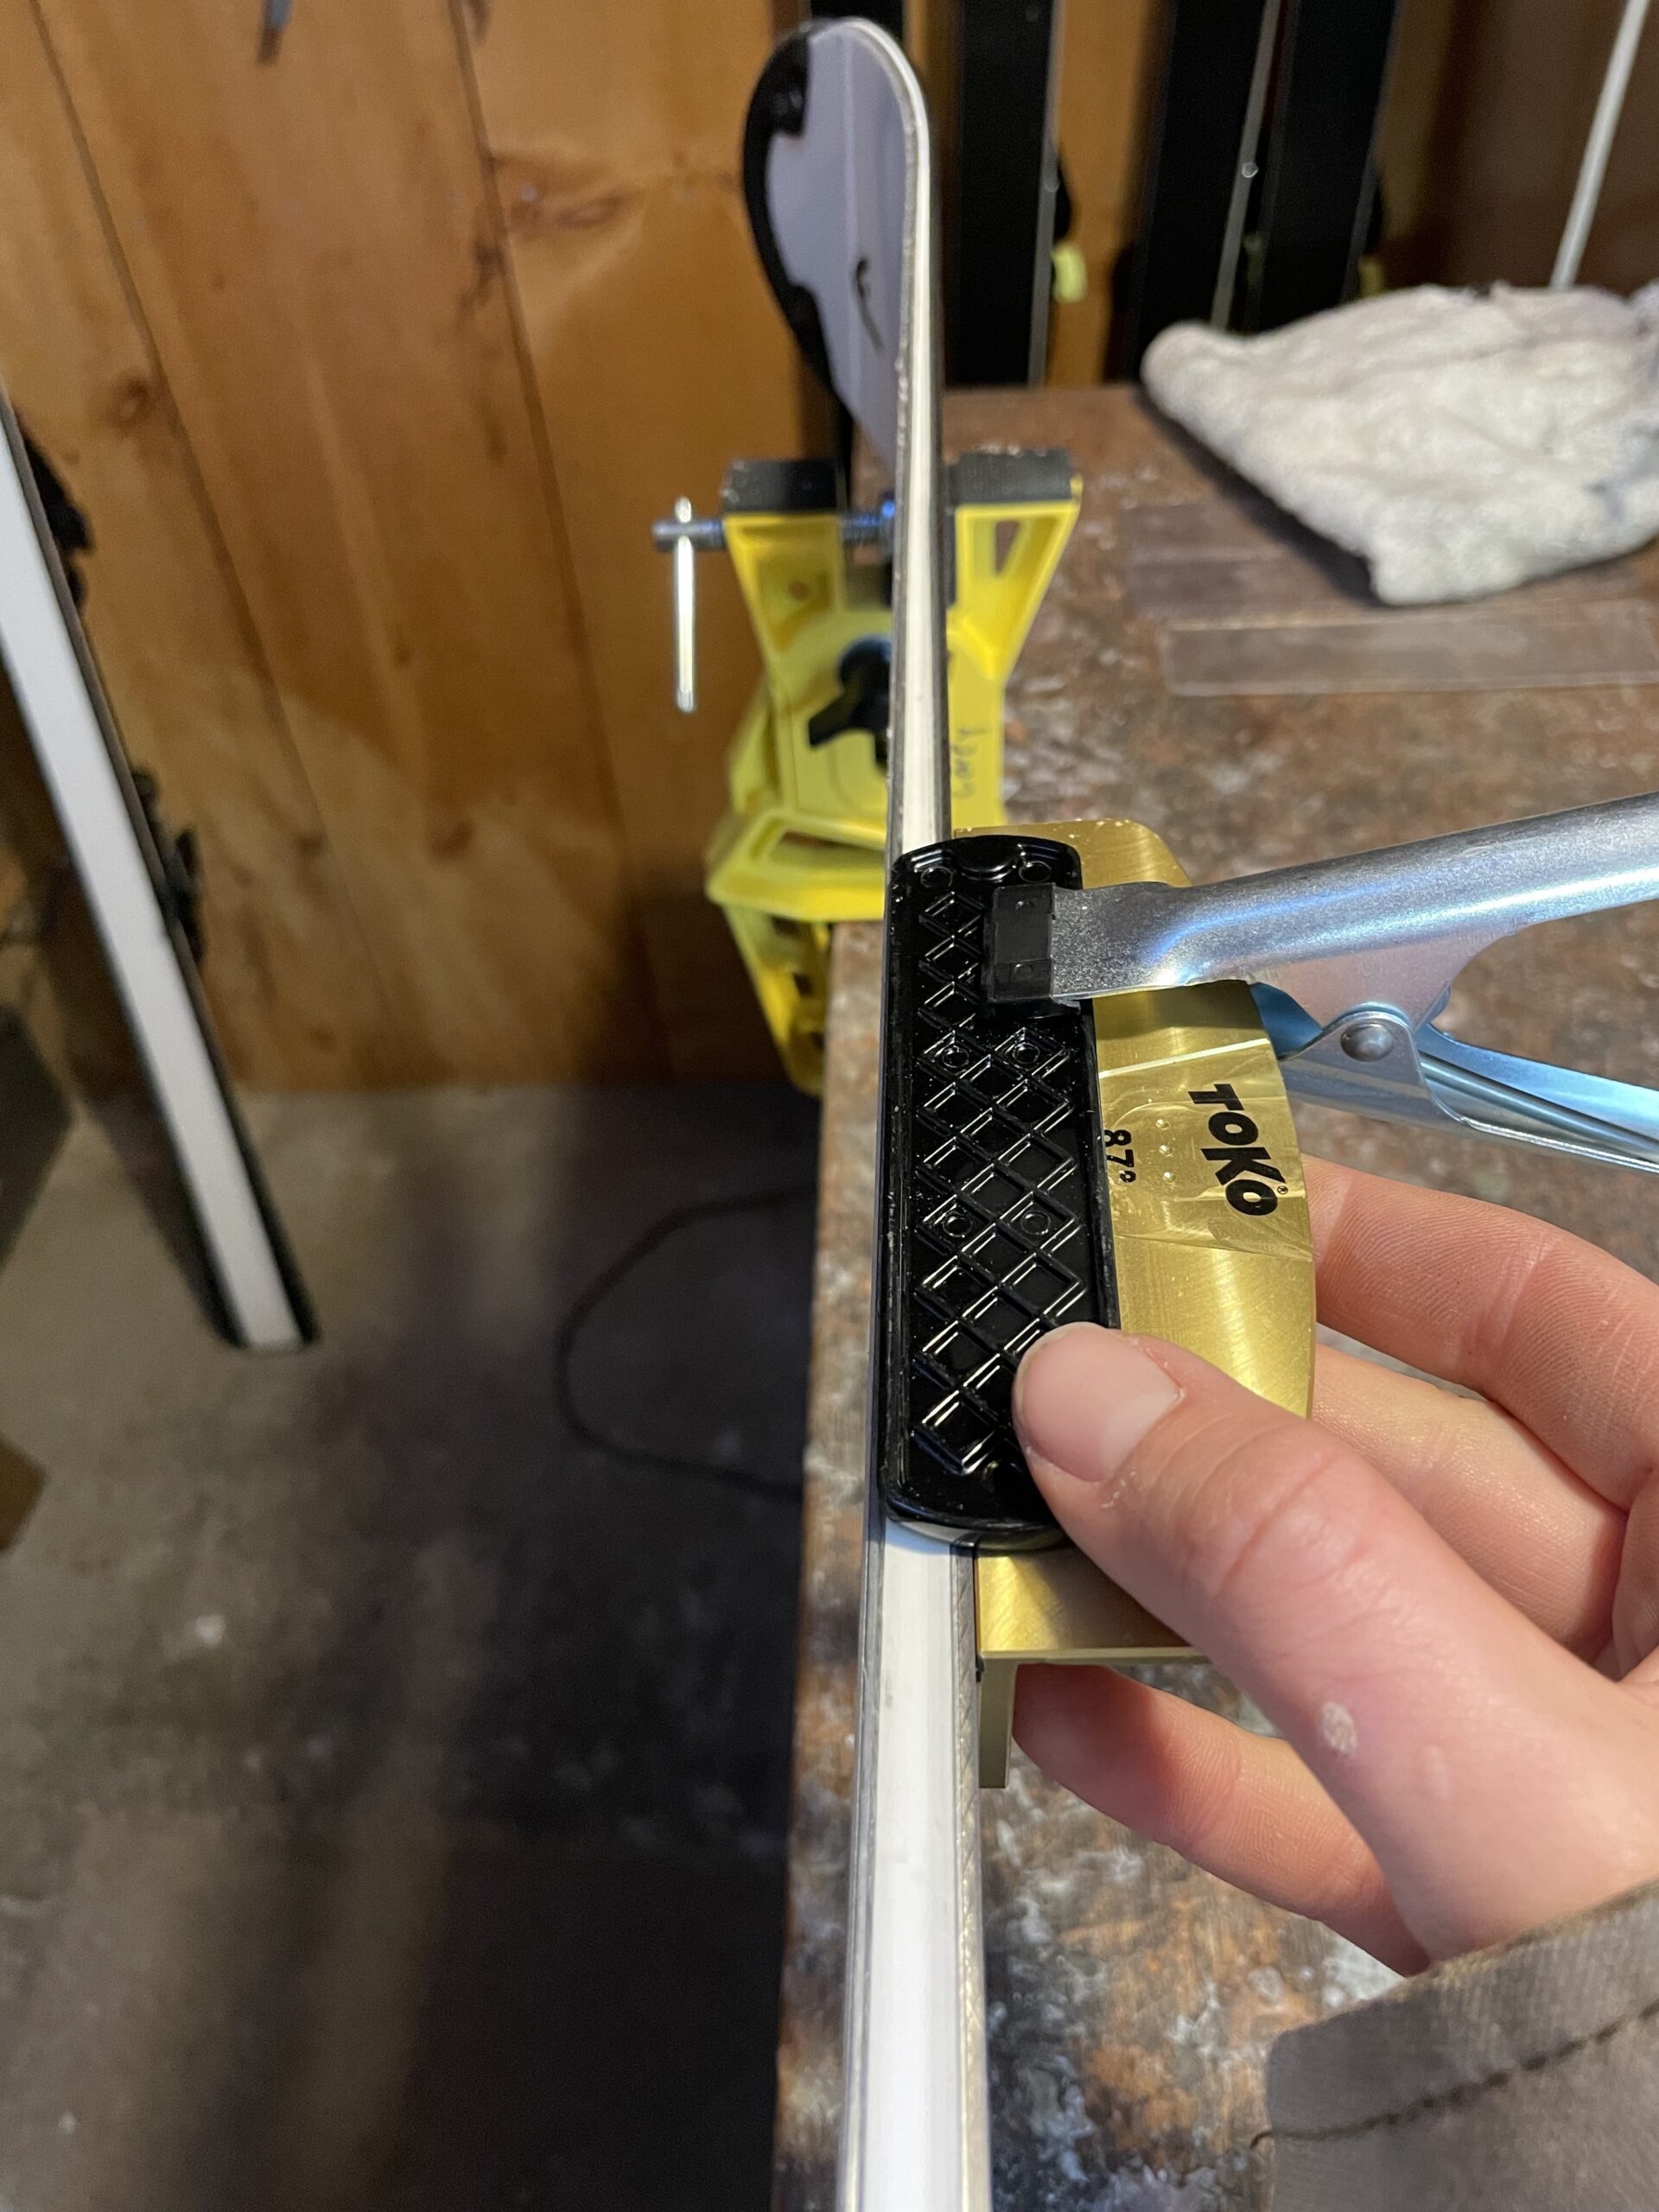
I begin with my medium (400) stone. If you’re unsure which stone to use, check the label on the bottom. After finding the right stone, I clamp the stone to my side angle guide, placing the clamp on the top right to leave room for my hand to hold the bottom. Pinching the guide and stone together with my fingers gives me the most control when moving it back and forth along the edge.
The stone can be passed both forward and backward along the ski’s edge. I like to start with short back-and-forth passes, working along the ski, and then finish with long passes along the entire edge. I run the stone four to six times before switching to the next one.
Cleaning Between Stones
After finishing with my first stone, I wipe the edge from tip to tail with a towel. This removes the tiny metal shavings created during stoning.
Next, I use the fine (600) stone, following the same steps. I always work in order: medium, fine, and then extra fine (1,000).
Checking for a Hanger
After stoning, I check for a hanger by running my fingernails upward from the base to the edge. If my nails catch just before sliding off, I’ve created a hanger.
Depending on conditions, I either leave it or remove it. To remove it, I lightly run the fine stone along the edge on the base side. This step is done freehand, without a guide, and requires light pressure. It’s important to run the stone flat across the edge—angling it can dull the ski, forcing you to restart the sharpening process.
Final Steps and Adjustments
Leaving the hanger on gives the ski extra bite on snow, which can be useful in certain conditions like pond ice. Otherwise, I remove it to avoid unnecessary catching while skiing. Once the hanger is removed, I feel the edge to check the sharpness. If it’s too dull, I run the medium or fine stone a few more times.
Now your skis are sharp and ready for any glacier terrain you might face!
Good luck! Abishai