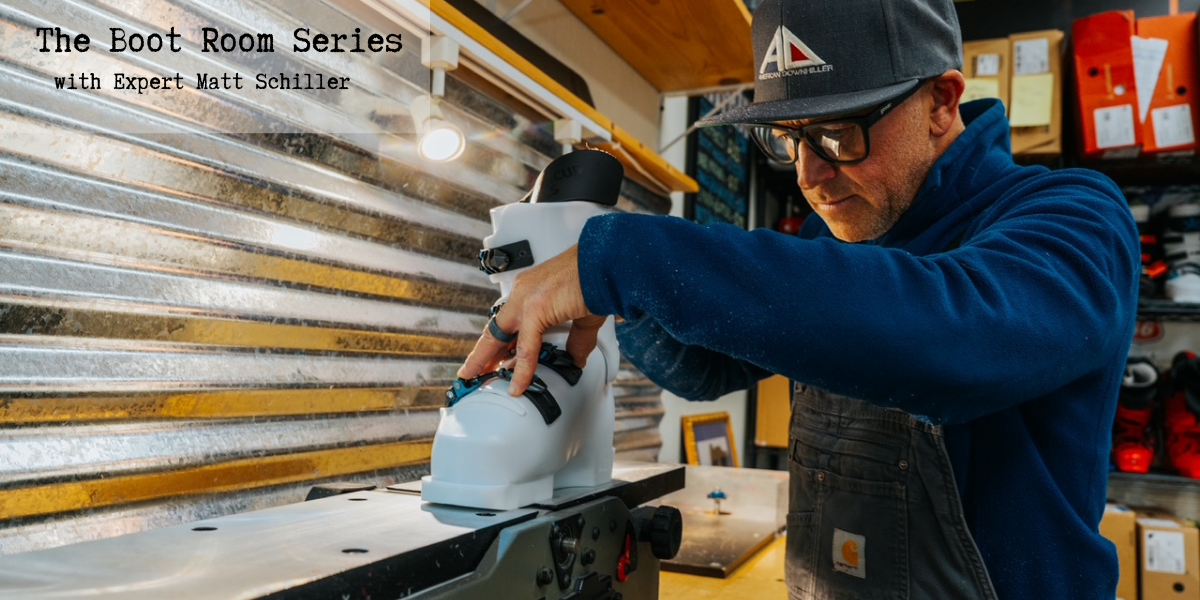
Fit Night Playbook: How Young Ski Racers Can Choose the Right Boots.
Brand representatives set up miniature trade-show booths filled with new equipment for athletes, parents and coaches to see, size, try on and ultimately purchase before another important season.
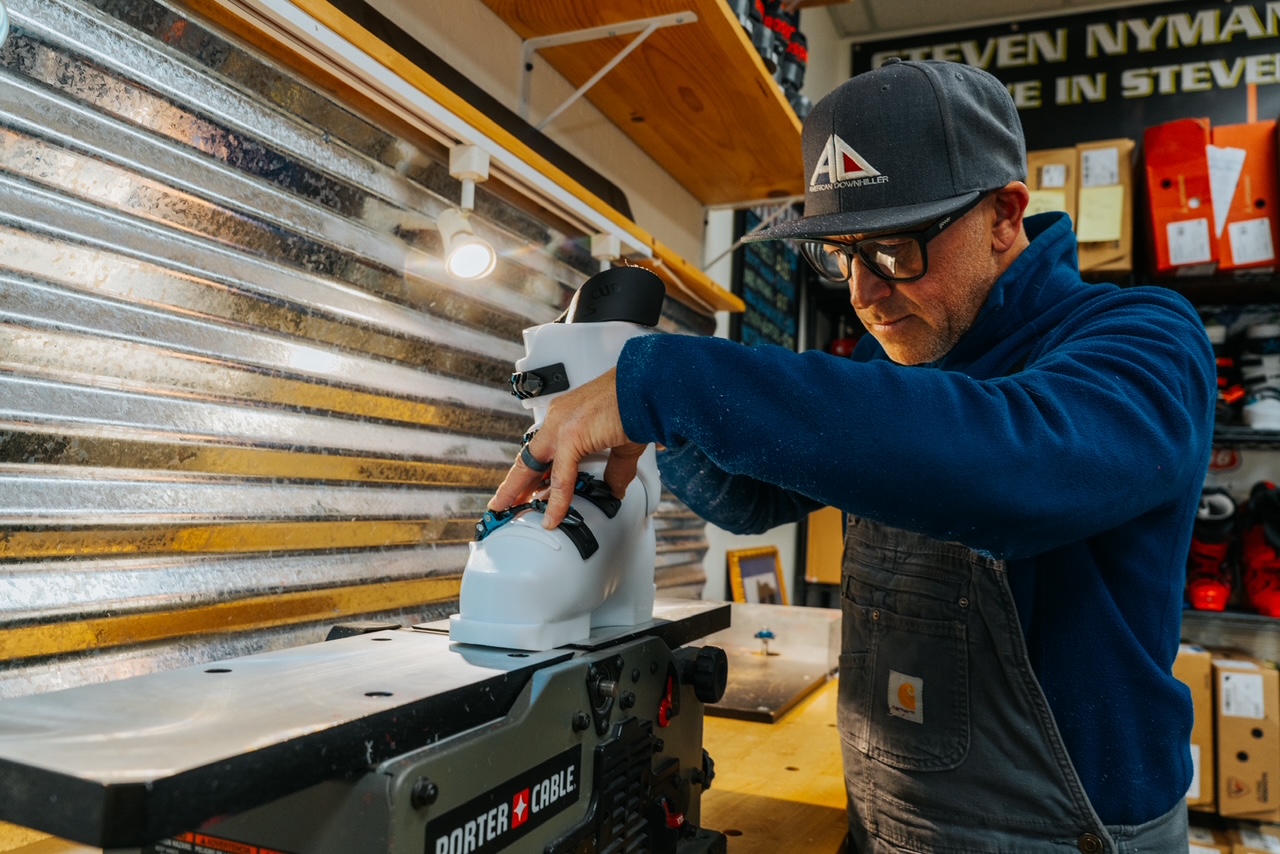
I have experienced these events from every side — as a coach, sales representative and dealer. This playbook is intended to help everyone involved make better decisions, particularly about the most important and misunderstood part of the setup: ski boots.
Coaches: Do the Work Before Fit Night
Before the event, learn about the products your athletes will consider. Call the representatives, request digital catalogs, discuss the different models, confirm pricing and establish contacts for service during the season. Get your feet into the boots. It is amazing how much you can learn by feeling the differences yourself.
Most importantly, use your experience to identify the brands and models that work well on snow. Then consider each athlete’s build, skill level, coordination and technical proficiency. Dryland training and postseason evaluations can reveal important clues.
Pay attention to an athlete’s body awareness, strength-to-weight ratio and experience in other sports. Look beyond foot and body type. How well does the athlete move over the feet, maintain balance and use natural athletic ability?
Those observations help connect the right boots with the right athletes.
Parents: Focus on the Athlete, Not the Flex Number
You know how your athlete performed last season, what your athlete can improve and how your child approaches sports.
Is your athlete an all-in, aggressive little ripper? Or is your child more cautious, methodical and analytical?
Look at the athlete’s everyday shoes. Are they wide, broken-in skate shoes or narrow, form-fitting running shoes? That preference may offer an early clue about fit tolerance.
Do not assume a stiffer, more aggressive boot will automatically produce better performance. For most U16 athletes and younger, a stiffer boot is usually the last equipment change I recommend.
I often joke that, among the hundreds of pairs that enter the shop, I soften far more boots than I make stiffer.

Athletes: Be Honest About Fit and Feel
Do you like the close fit of soccer cleats? Would you rather wear Crocs or Uggs? Do you unbuckle your boots after training runs, or can you “set ’em and forget ’em” all day?
As you move into higher-performance boot categories, you will be asked to accept a closer fit. Think honestly about how you want your equipment to respond in race conditions.
New liners are thick and full. They compress after several days of skiing and become more comfortable with use. A boot fitter can also create space in the shell for toes, pressure points and bony areas.
The boot should hold the entire foot, ankle and lower leg securely. If you already feel gaps or looseness, pay attention. Your ankle should be able to work inside the boot while your lower leg smoothly drives the upper cuff forward and back.
Remember that a boot tried on in a 75-degree parking lot in September will feel substantially different at 15 degrees in November, when you are moving downhill at speed.
Talk honestly with your coach about technical problems that may have been connected to last season’s equipment. Perhaps you skied in the back seat, twisted the upper body or leaned on the inside ski. Boots that were too stiff, too loose, too far forward or poorly buckled may have contributed to those patterns.
Homework: Anatomy Lesson — Learn How You Are Built
We are all built differently, and so are ski boots. A simple exercise at home can provide useful information before fit night.
Sit in a chair with your knees bent at 90 degrees, your feet flat on the floor and your ankles at approximately 90 degrees. Keep your feet about hip-width apart. We call this the 90-90-90 position because it creates an anatomical lower-body box.
Click on the images to enlarge
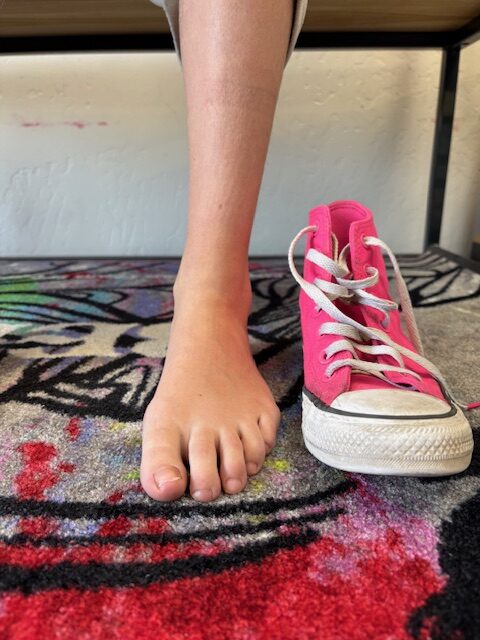
A parent or coach can take a photo from the front and side. What does the athlete’s anatomy show?
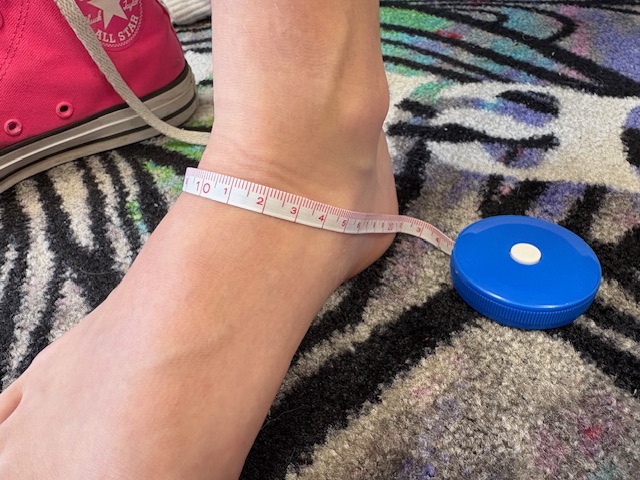
Are the toes long, shins thin, ankles narrow and arches low? Are the lower legs shorter, calves wider, toes more square and insteps higher? Those characteristics offer the first clues about which boot shells might provide a good match.
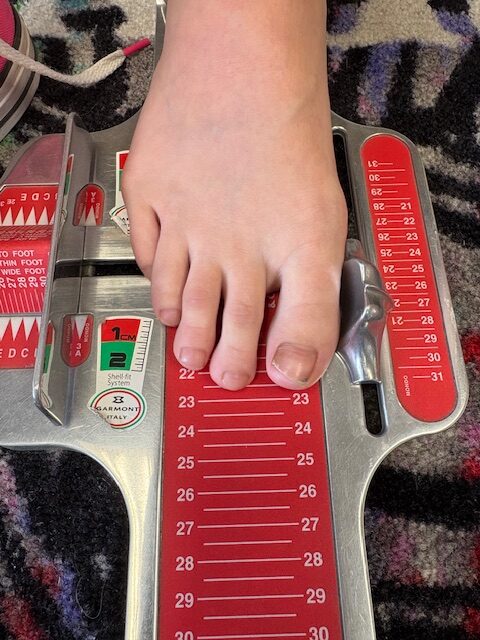
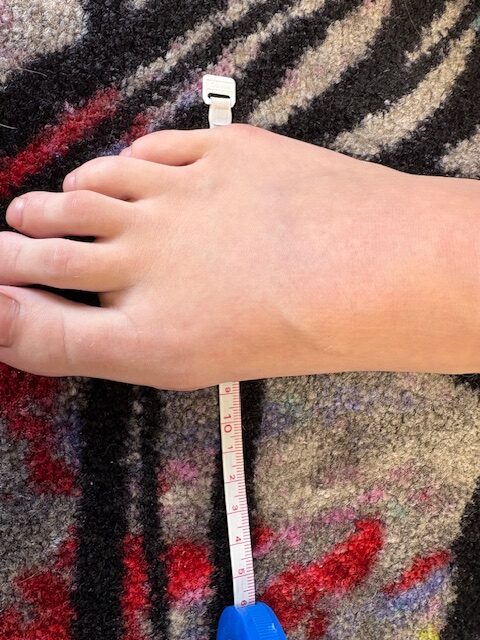
As a boot fitter, I measure at least three ways: foot length, forefoot width and volume around the instep and heel. Some feet have relatively consistent proportions. Others fall outside the norm in one or more areas.
Examine Mobility, Not Just Foot Shape
Next, stand slowly and watch what the feet do. Do they widen, collapse inward or remain stable? Save that observation for a later conversation about footbeds. For now, it can help identify why certain parts of the foot and boot may disagree.
Then slowly flex the ankles forward as if pressing the shins into an imaginary boot. Can the knees travel over the toes, or do they stop short as the heels begin to lift? Does the athlete need upper-body movement to create more ankle flexion?
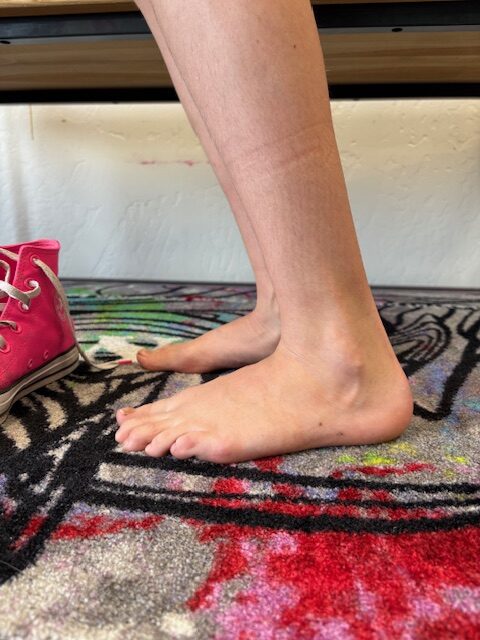
Compare that movement with a photo of the athlete passing a gate with the arms behind, hips low and lower legs relatively upright. These observations help reveal the athlete’s functional range of motion.
Boot selection should account for those mechanics. Fit is not simply a matter of matching foot length to a number on a box.
Why Flex Ratings Are Misunderstood
An athlete’s mechanical ability and physical makeup should guide the choice of boot design and model. Yet every year at race-fitting events, I see the same rushed process.
Athletes line up at a representative’s booth, put one foot into one boot and immediately decide it is too small. They move up a size for more toe room and future growth. Then they request a particular flex because it is one step above last year’s boot or because a coach said, “Get a 110.”
The same thing happens with lace-up liners. Athletes and parents sometimes view them as the automatic next step at a certain age — or as something that will magically make the athlete faster.
However, the athlete may not yet be ready for the closer fit, may lack the strength to manage the performance jump or may not be prepared for the additional care the equipment requires.
What a Lace-Up Liner Changes
A lace-up liner can provide a closer hold because its thinner, denser material conforms closely to the foot and lower leg. It also allows manufacturers to use a shell with thicker plastic walls and less space between the athlete and the boot, improving input transfer.
Those benefits do not make it the right choice for every athlete.
Explaining all the possible fit modifications can be difficult during a crowded, rushed sale. Some pressure points are relatively easy for a boot fitter to address. Other areas must remain accurately snug for the boot to work.
Of all the race equipment purchased during the hour often devoted to preparing for an expensive and important season, boots deserve more time. The best option may be a separate visit to the supporting race shop, where the athlete, parent, coach and boot fitter can carefully review the choices.
Do Not Let Brand Loyalty Decide
The next model or flex in an athlete’s favorite color may use a completely different design and no longer suit that skier. That can require changing brands from one season or development stage to another.
Within a single brand, the construction, fit and performance can change substantially from a children’s 65- or 70-flex boot to a junior model in the 70-90 range and again to an adult race boot in the 110-150 range.
One brand may work especially well at one stage, while another becomes the better choice later.
However, manufacturers have invested heavily in research and development to bring many benefits of top-end, race-specific models into softer, low-volume U12 and U14 packages with semi-lace liners.
Brand loyalty is understandable, but it should not come at the expense of development. Shop according to the athlete’s needs, not the logo or color.
What Is the Difference Between the Blue, White, Red, Yellow, Black or Gray Boot?
Plenty.
The differences among brands may appear small, but they matter. Each boot has its own geometry, including bootboard ramp, upper-cuff forward lean and cuff height.
Manufacturers also use different plastic formulations, giving each boot a characteristic elasticity and flex feel.
Boots are three-dimensional puzzles. The familiar flex number does not tell the whole story. Some boots move subtly and progressively through a range of travel. Others feel like static bricks. Some flex, or “hinge,” more effectively at the connection between the upper and lower cuff.
Consider everything you have learned about the athlete: approach, anatomy, strength and mobility. Only then should color enter the conversation.
The Three Priorities: Fit, Stance and Flex
1. Fit
Remember the three basic measurements: length, forefoot width and overall volume. Of those, ankle and heel volume are especially important.
If you size a boot primarily for toe room or rely only on the Brannock device — the metal measuring tool commonly found in shoe stores — you may end up with far too much space around the ankle, heel and Achilles tendon.
That part of the anatomy communicates directly with the boot. The foot must be secure enough to transfer small movements into the shell.
A boot fitter can modify the shell to create room for forefoot width, prominent areas or long toes. Start with a proper shell check. The fitter removes the liner, places the athlete’s bare foot in the shell and assesses the space surrounding it.
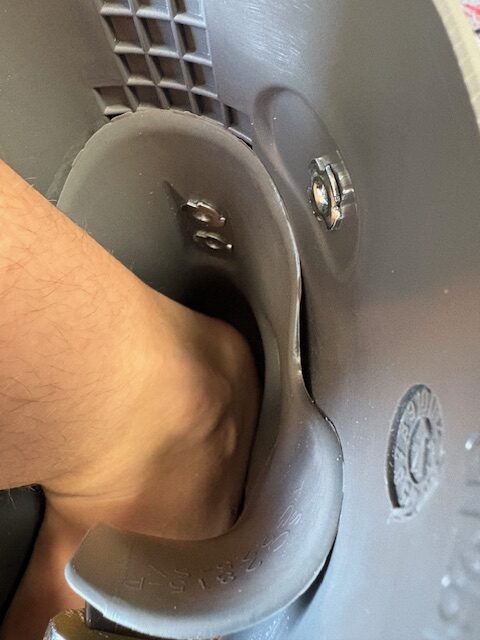
You may hear references to a “one-finger” or “two-finger” fit. Parents are understandably concerned about growth during the season, but the goal should be a boot that works now rather than one sized for what might happen four to six months later. When availability and cost allow, replace the boot when the athlete actually outgrows it.
Do not let the new liner create a false impression. Liners begin as pillows of foam and fabric. They are designed to conform over time, and body heat can help shape or soften them.
Athletes often try on boots in warm weather after dryland training and a summer spent in loose shoes or flip-flops. Of course a performance fit feels tight at first. The question is whether that tightness reflects a close, workable fit or the wrong shell.
2. Stance
Which platform feels most natural under load? Can the athlete stack the body with balanced mobility through the ankles, knees and hips?
Think about a squat in the gym. Can the athlete carry weight and remain balanced over the whole foot, or does part of the body compensate as the athletic posture becomes lower?
Each boot places the athlete in a slightly different position. If a boot forces the skier to the limit of available mobility or leaves the athlete on the heels with relatively upright lower legs, movement may feel awkward and physically demanding. That is probably the wrong mechanical match.
It would be difficult to perform 50 wall sits in a slalom course, no matter how strong the athlete is.
Better-matched boot geometry allows bone structure to support power transfer and balance corrections. It reduces the muscular effort needed to remain agile against the front of the cuff.
To feel this difference, test the boots both with and without the removable spoiler behind the liner. One setup may produce a more natural position over the feet. Make this comparison with a knowledgeable coach or boot fitter.
3. Flex
Flex numbers are manufacturer-specific guides used to position boots within each company’s product line. There is no industrywide standard that allows direct comparison across brands.
Once athletes understand their own mechanics, strengths, weaknesses and power profiles, they can better judge flex in context.
There is a relationship between mobility, strength and technical proficiency. For developing racers, it is usually wise to stay on the softer side until they acquire lower-body fundamentals and establish a balanced, stable upper body.
Once an athlete can consistently create and recognize the right sensations through the feet and lower body, additional stiffness may help transfer more force into the ski. Stiffness should enhance proper reactions, not substitute for them.

The Takeaway
Athletes develop at different rates based on age, genetics and training experience. Their equipment should follow that progression.
The process begins with a clear understanding of the athlete’s measurements, athletic profile and technical proficiency.
From there, choose models that match the skier’s mobility, mechanics and power. A proper shell fit helps create the best connection between the body and boot.
Done correctly, the boot becomes an extension of the athlete and a stable platform from which the skier can move as intended.
The next articles in this series will address footbeds, stance and alignment, and the complete ski-plate-binding-boot system. I also encourage readers to submit questions. Common concerns and trends can help shape future installments.
Labor Day arrives like clockwork, and the change of seasons shifts the focus back to ski racing. It also marks the start of “race night” events at clubhouses and supporting race shops across the country.
Brand representatives set up miniature trade-show booths filled with new equipment for athletes, parents and coaches to see, size, try on and ultimately purchase before another important season.
I have experienced these events from every side — as a coach, sales representative and dealer. This playbook is intended to help everyone involved make better decisions, particularly about the most important and misunderstood part of the setup: ski boots.
About the Author: Matt Schiller