With new skis, the top sheet, sidewall material, second edge, and other ski layers can often get in the way of the edge in the tip and tail. All of this material tends to create a “wall,” which blocks files and edging machines from being able to sharpen the edge. The process of reducing this material in the tip and tail and exposing the edge for sharpening is commonly referred to as shaping.
Protect the base
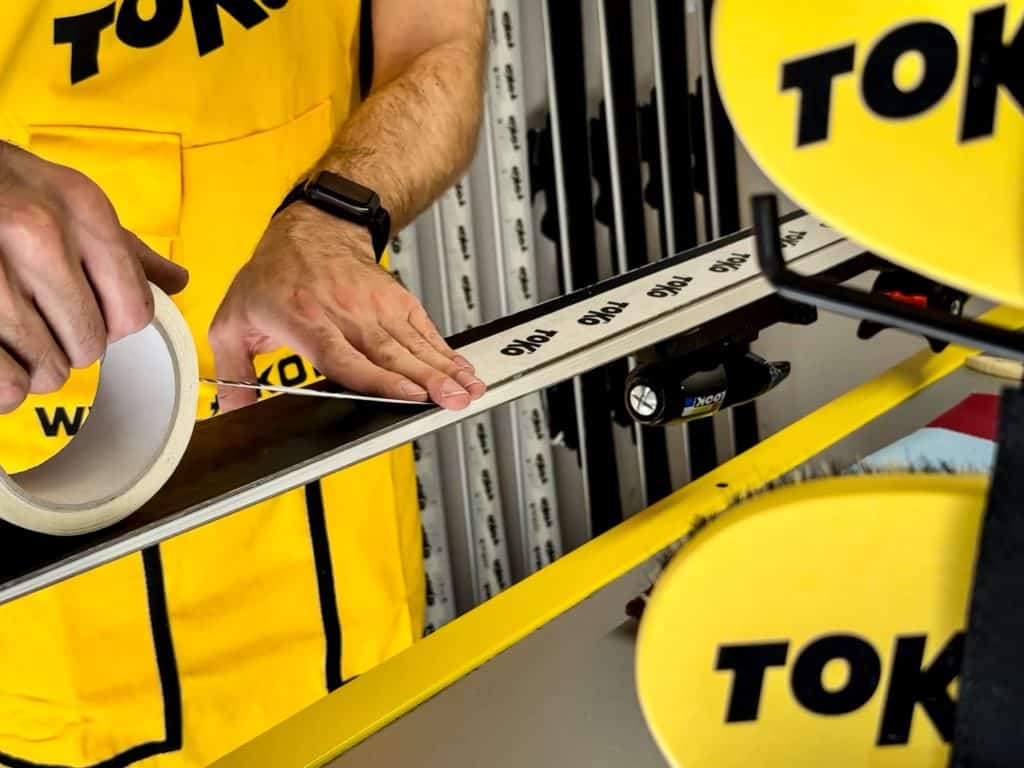
To begin shaping a set of skis, it’s best to start by protecting them from any damage that can occur to the base in the following steps. To do this, apply a thin coat of wax, such as Toko Base Performance Red which is soft enough to create a buffering layer but not hard enough that it may chip and damage the base.
Once the wax cools, apply sidewall tape on top of the wax on the bases along the entire length of the ski. This is done to protect the base of the skis from any damage from debris that builds up and may become trapped under your tools as you work. You don’t want to accidentally damage brand-new skis by dragging a speck of metal or sidewall along the entire base.
Shaping the tip and tail
Once the ski bases are waxed, taped, and protected from damage, it’s time to get to work. Place the skis in a sturdy set of vices, such as the Toko Ski Vise World Cup. Then, using a panzer file, slowly shave back the tips and tails until the overall sidewall angle of the tip and tail matches that of the main body of the ski.
Typically, this only needs to be done in the first 6-8 inches of the tip and the last 3-4 inches from the ski’s tail. Be conservative so you don’t remove too much material and potentially affect the ski flex. Only minimal material must be removed to expose the side edge for tuning.
Next, using a Toko WC file, smooth out your work in the tip and tail and blend everything together so it looks and feels smooth.
**Pro Tip** Skis that have been shaped in the tip and tail not only make it easier to sharpen the side edge but also help to protect the tips from damage caused when ski tips bump into each other while skiing.
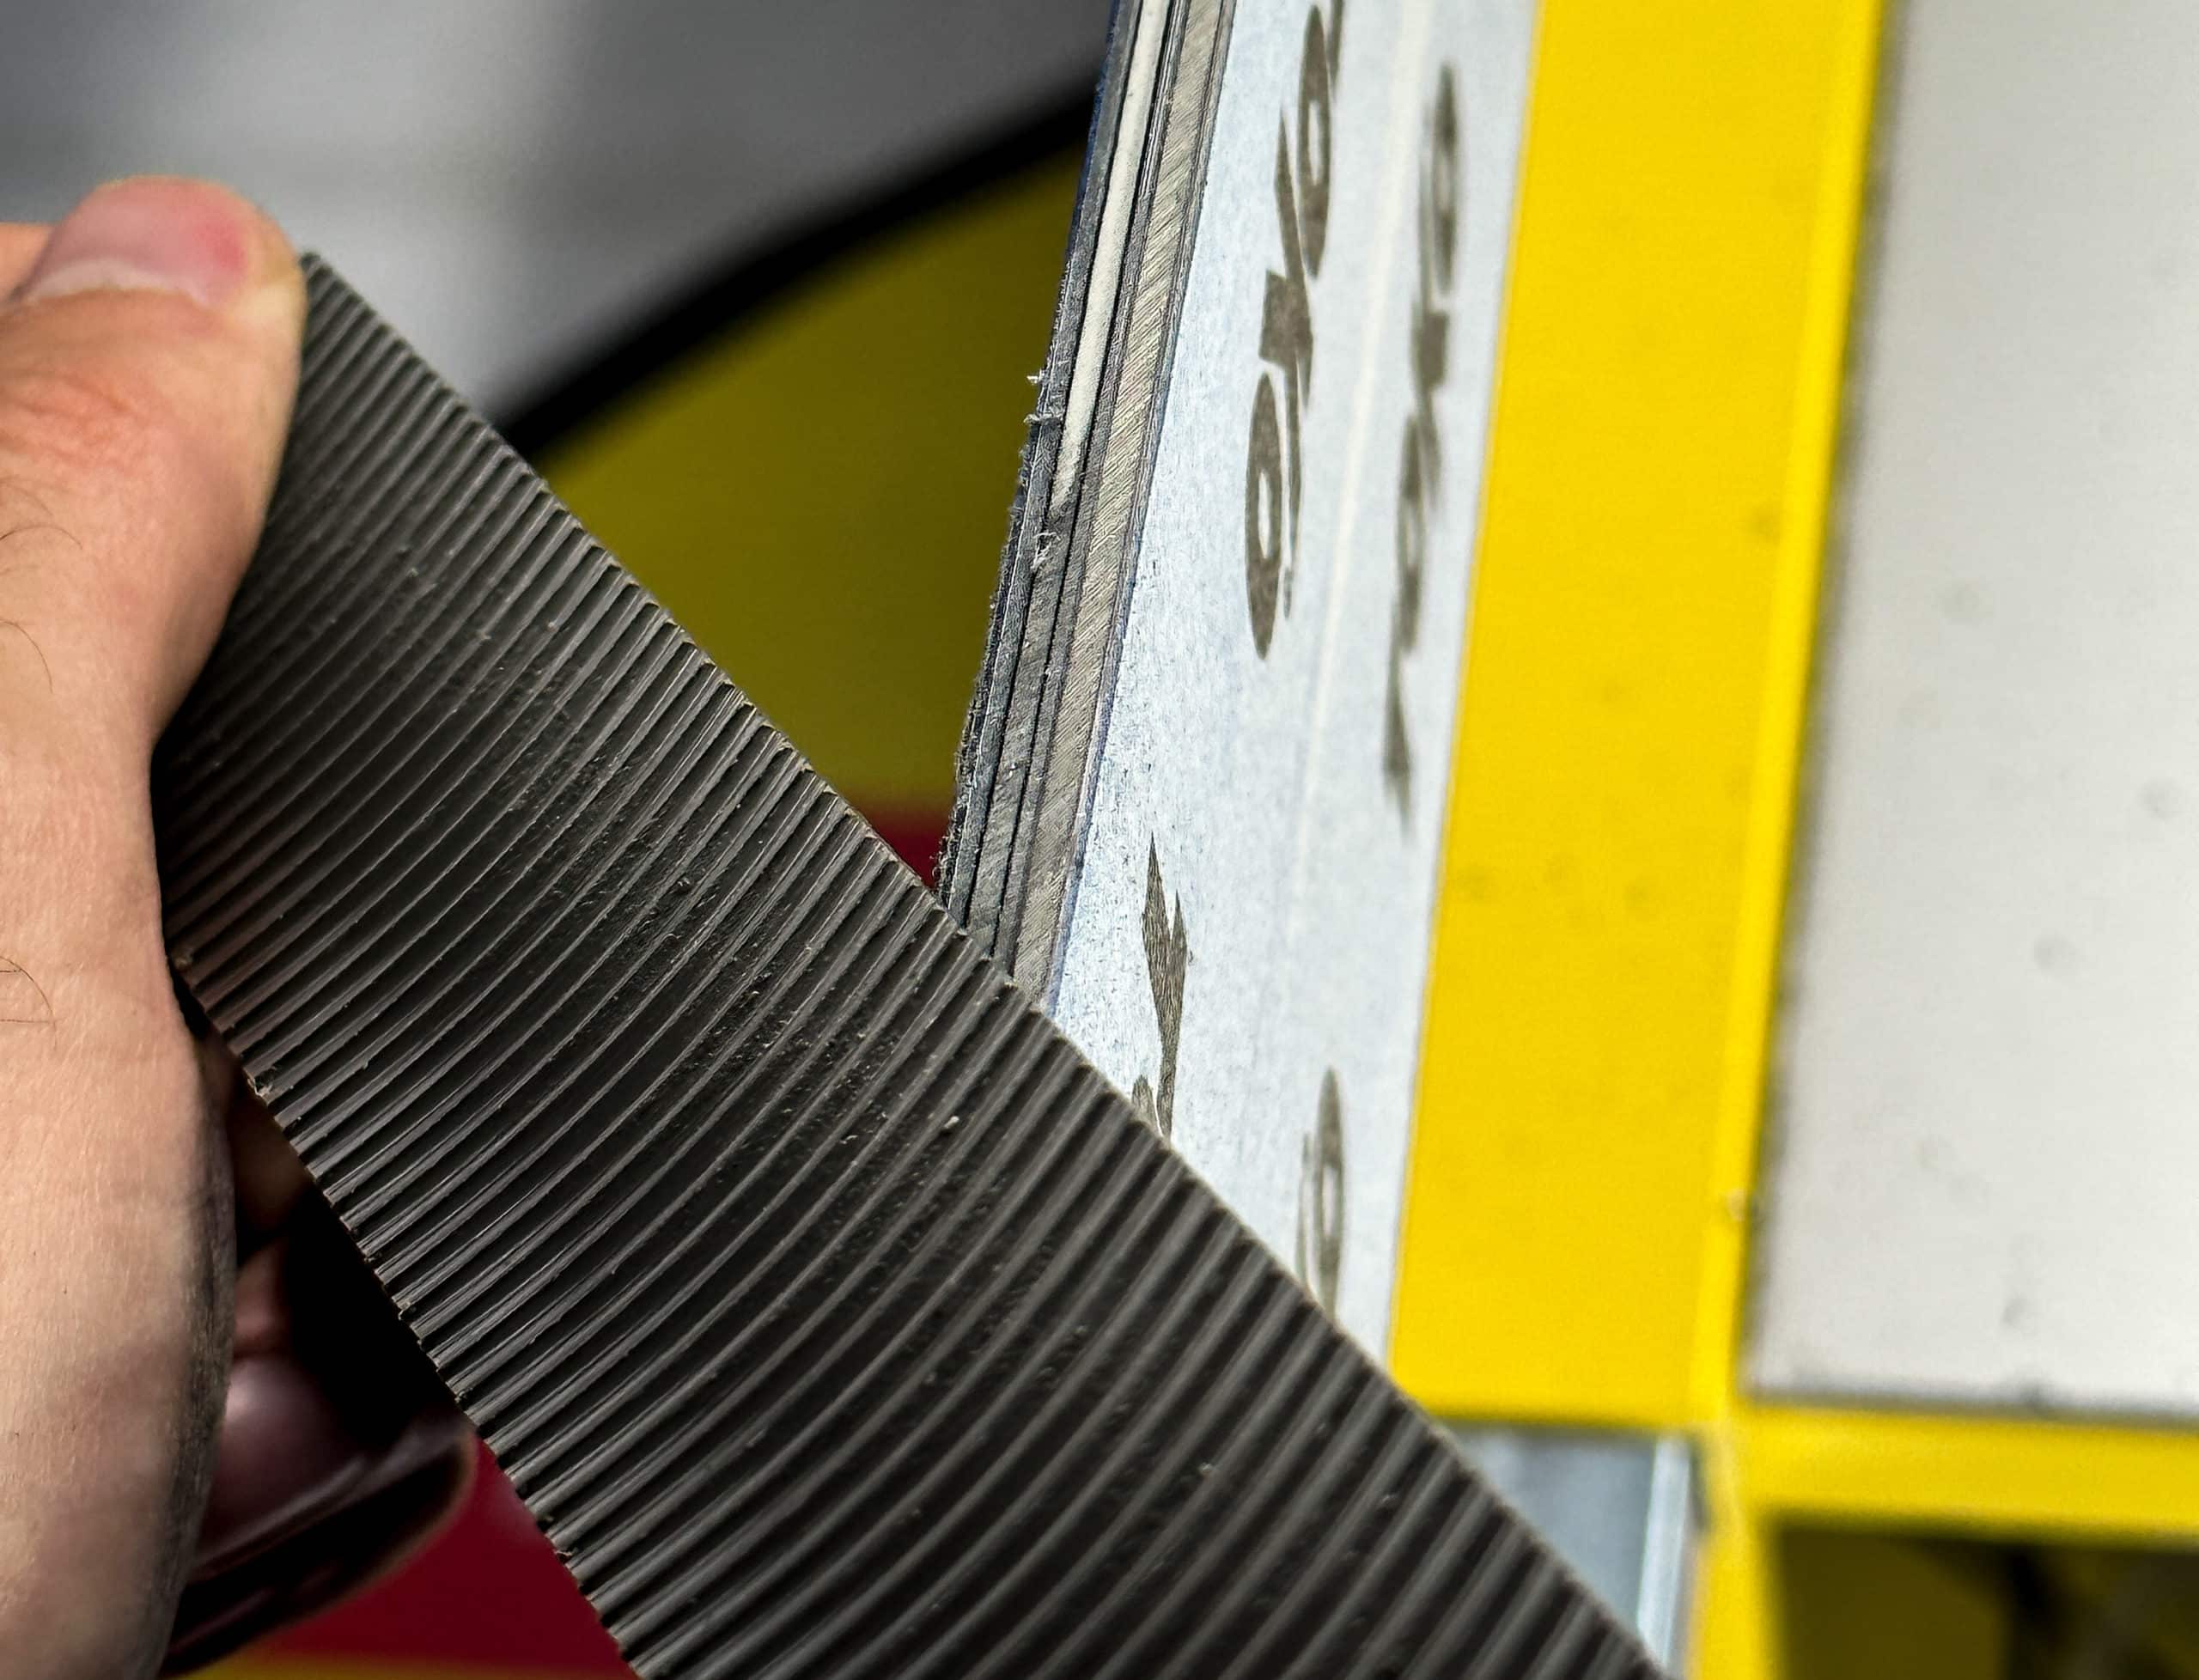
Now that the ski has been shaped, it’s time to prepare the sidewalls. The sidewall step and the second edge must be lowered to expose the side edge for sharpening. To do this, use an adjustable sidewall planer such as the Toko Sidewall Planer World Cup, which can easily be adjusted to cut both the larger ABS step (dense white material shown in the photo below that makes up the majority of the sidewall) as well as the smaller second metal edge.
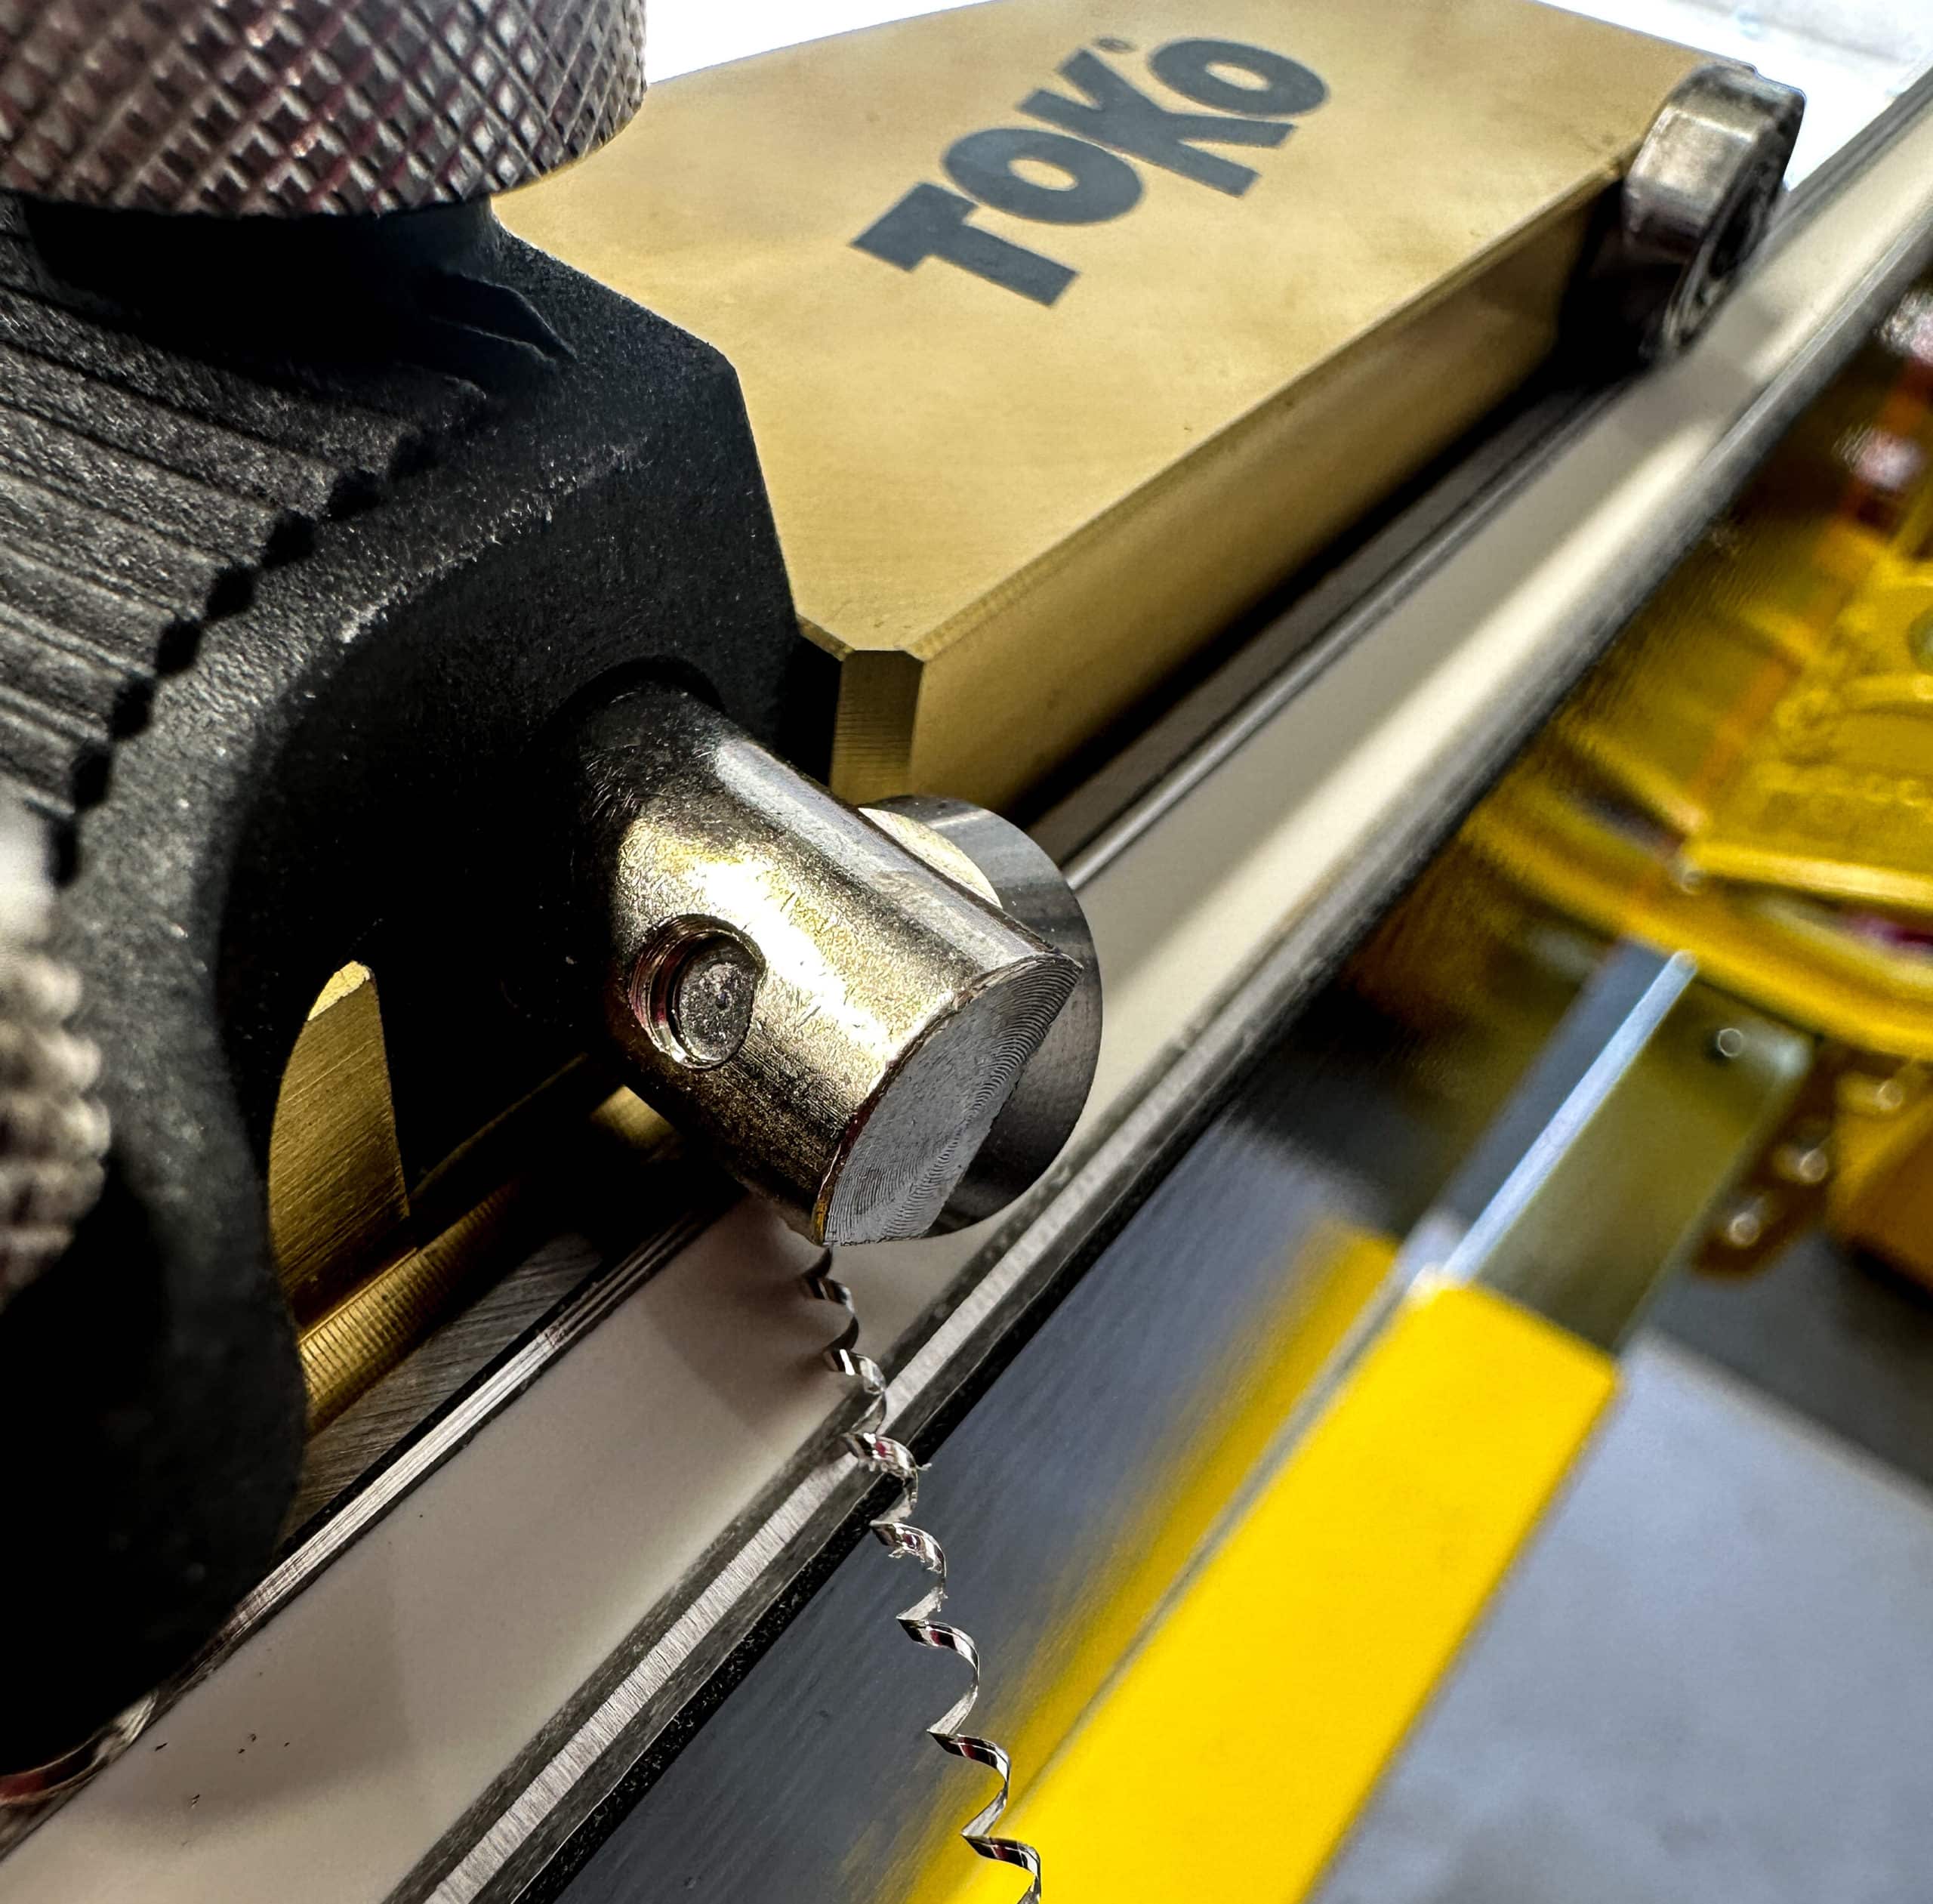
To plane the sidewalls, start by adjusting the blade to sit just on top of the ABS step, it looks like a small stair step going up towards the side edge) and then gently plane down the sidewall step to ensure that it is lower than the side edge.
Next, adjust the blade on the sidewall planer to sit right on top of the second edge. Once adjusted, using very little pressure on the tool, pull gently to ensure that only the second edge is curling up and being removed as the tool moves along. If done correctly, only a thin metal strip curling up should be experienced as the tool moves along the length of the ski.
**Pro Tip** Skis that have been shaped in the tip and tail make it easier to sharpen the side edge but also help to protect the tips from damage caused when ski tips bump into each other while skiing.
Once the ABS has initially been lowered, the ABS sidewall material should not need to be lowered again throughout the ski’s life. Suppose the ABS sidewall material is removed over and over again. In that case, eventually, there will be a gouged-out trough next to the side edge, which can reduce the integrity of the ski. Regular maintenance during the daily tuning should be as simple as removing a small amount of the second edge as needed.
If you’re working with an edging machine, a good indicator that the second edge should be lowered again will be if striations from the machine’s sharpening disc are visible on both the edge and the second edge.
If you’re tuning with a file and guide, a good indicator that the second edge is in the way is if the skis still won’t sharpen, no matter how many passes are taken with a file. This is likely because the file cannot cut the edge due to interference from the second edge being too high. In either case, the second edge must be slightly lowered using the sidewall tool with the blade adjusted to sit right on top of the second edge.
Sanding the Sidewalls
Now that the skis have been shaped in the tips and tails and the sidewall and second edge have been pulled back, it’s time to get out the sandpaper.
Starting with a medium grit sandpaper, such as 220 grit, lightly and carefully move back and forth along the sidewall, smoothing out and blending the work from the previous steps. The result should be a sidewall that is smooth and even throughout.
Next, use finer grit sandpaper, such as 400 grit, and repeat the previous work. Make sure only to apply light pressure.
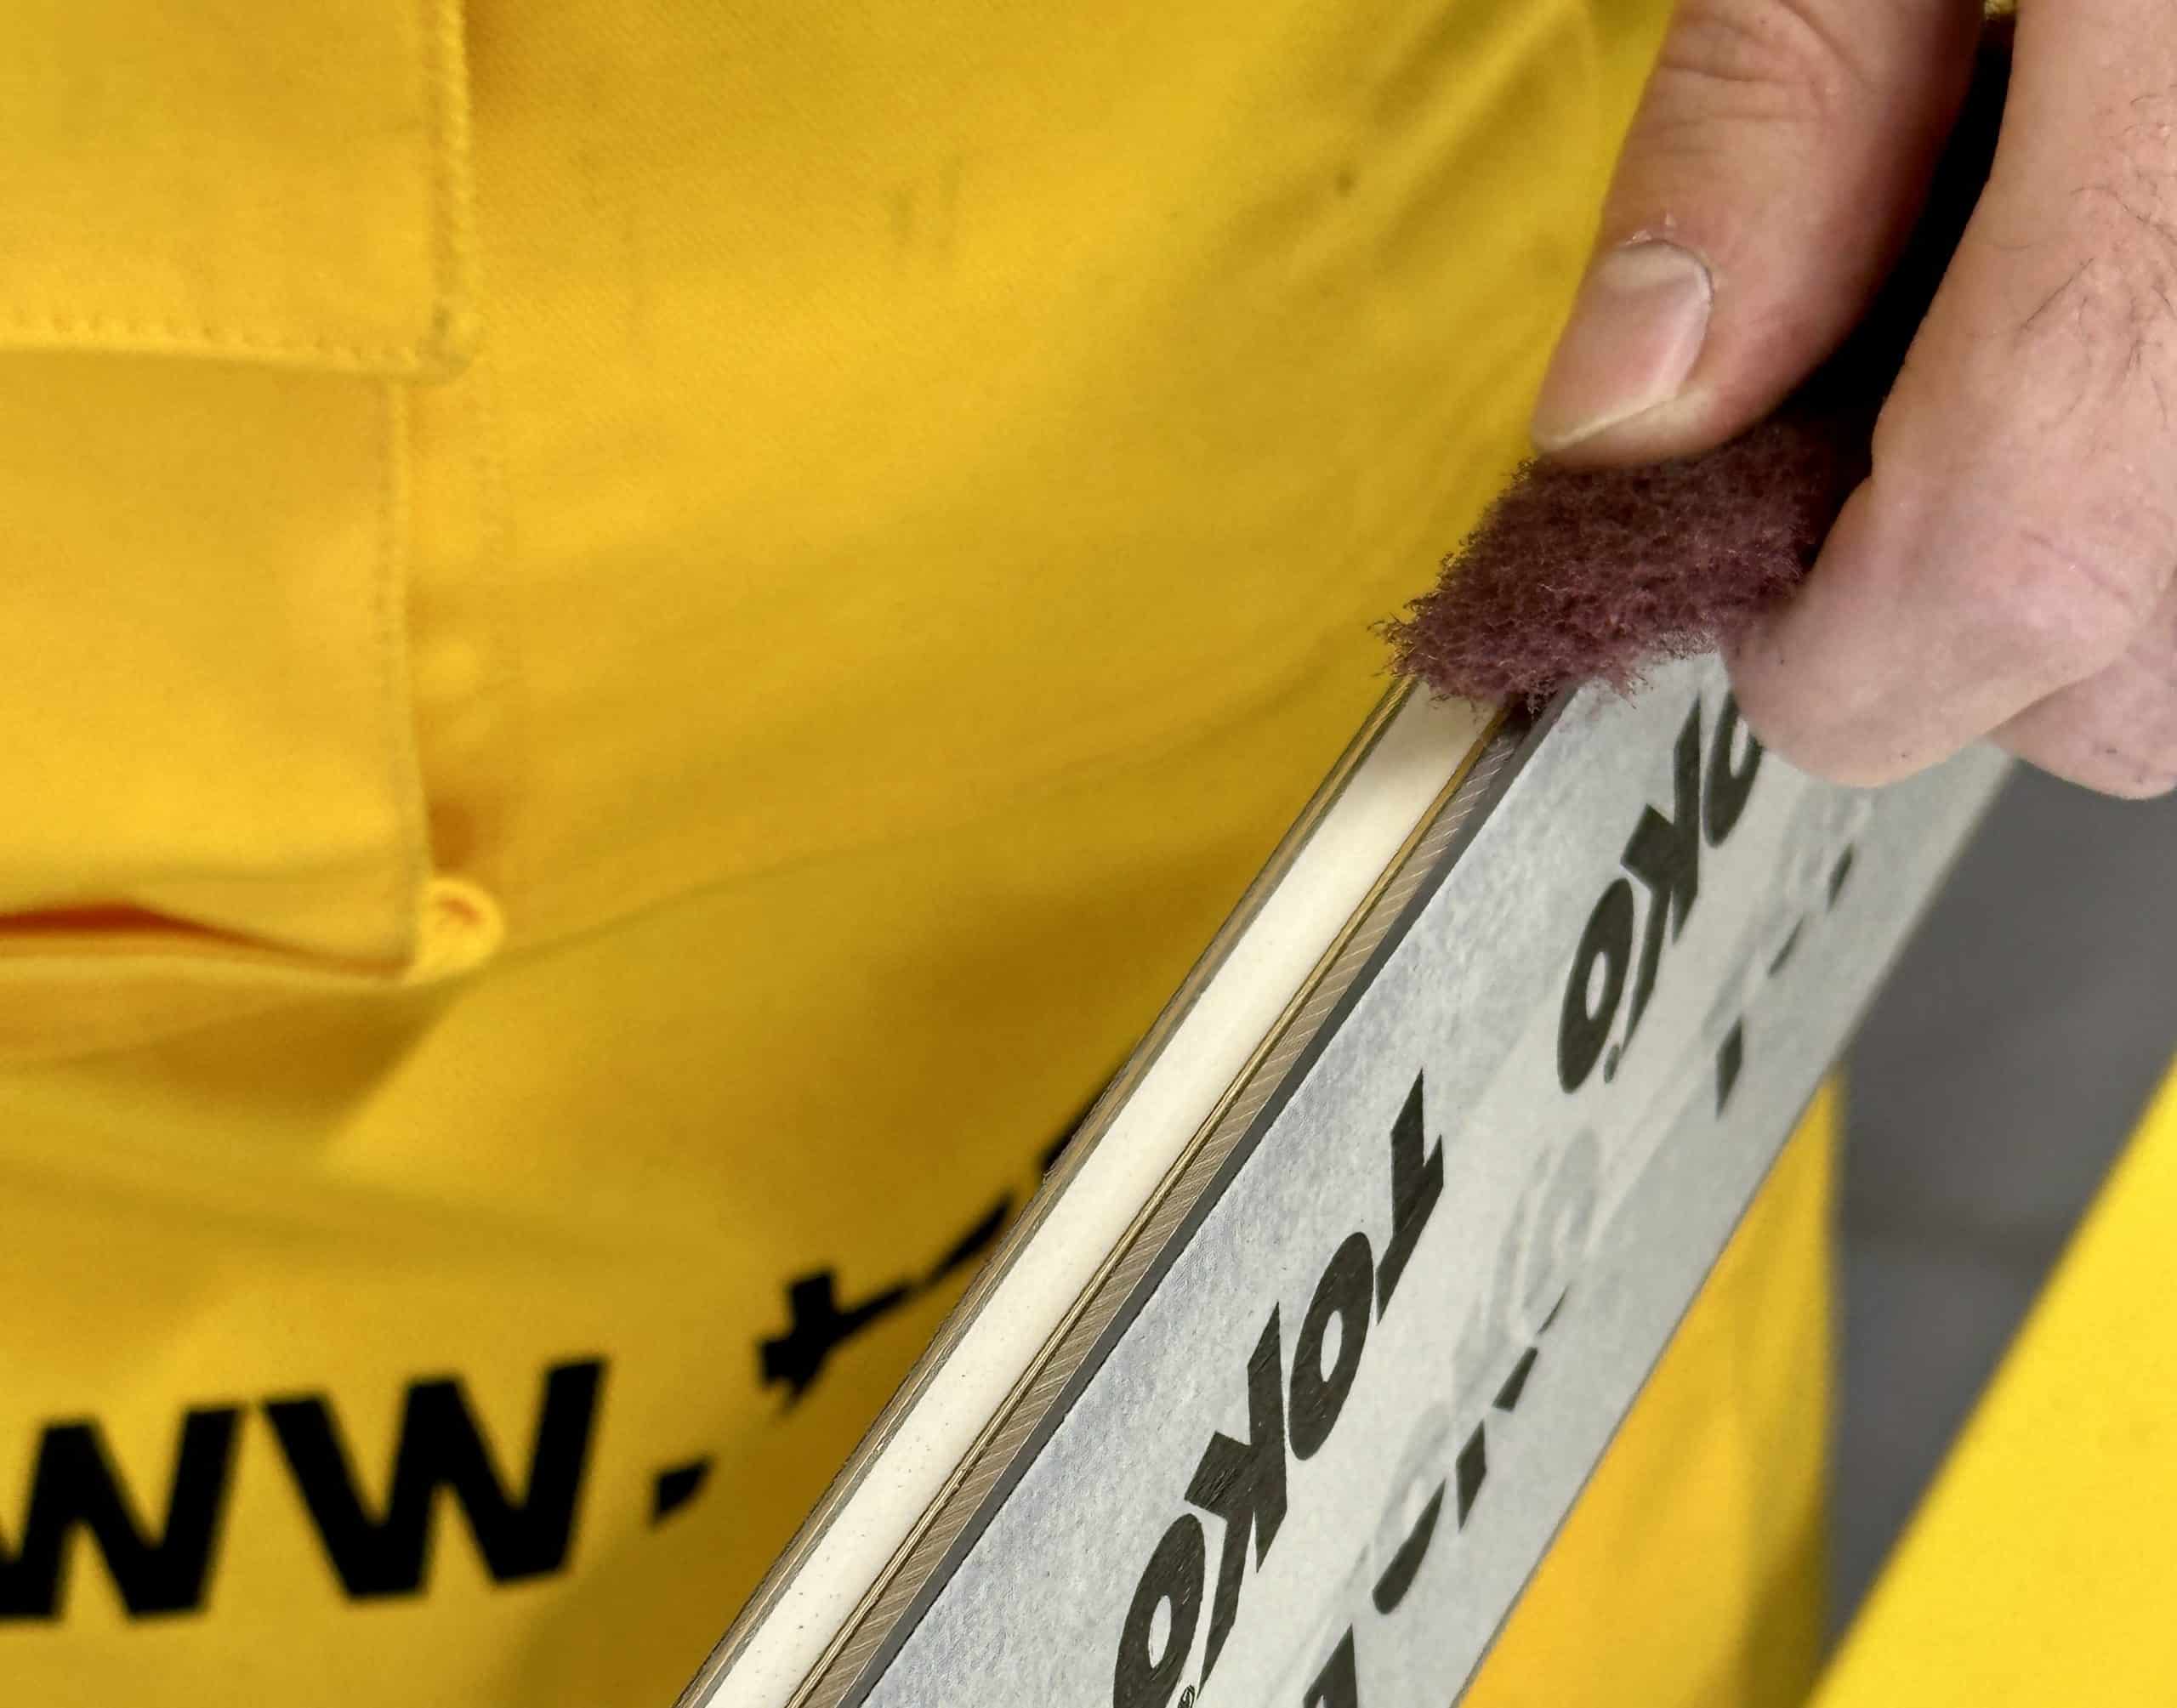
Lastly, clean up and polish the sidewall using a small piece of maroon Scotch-Brite pad to remove any remaining rough spots, then apply a bit of Toko HC3 wax remover to a shop towel to polish the sidewall.
At this point, the new skis are ready, with the tips and tails shaped, the second edge pulled back, and sidewalls that are buttery smooth, fast and ready to be sharpened!